
Are you often dealing with a low microphone volume that ruins the quality of your recordings? If so, you’re not alone. Many people struggle with a muffled or inaudible sound from their microphones, making it difficult to produce high-quality audio.
Fortunately, there are some tried and true methods for increasing the loudness of your digital wireless microphone without sacrificing sound quality. Here are some of our top tips for making your microphone louder and creating optimal sound levels for recording.
1: Use a Pop Filter
A pop filter, sometimes known as a foam windscreen or acoustic filter, is designed to reduce the popping and crackling that can occur when your vocal cords interact with nearby air movements.
They also increase the clarity of your recordings by filtering out any distracting background noise. A pop filter should be attached just in front of your microphone, and it will improve sound quality while also allowing you to turn up the volume slightly.
When using a pop filter, experiment with the distance between it and your microphone to find the sweet spot that works best for you. If it’s too close, then it will reduce the overall volume; if it’s too far away, you won’t get the desired effect. Adjust accordingly until you find an ideal setting for your situation.
2: Optimize Your Room Acoustics
If you have any type of reflective surface in your recording space, such as glass windows or hard floors, these can create annoying reverberations and echo effects in your recordings.
To minimize this problem and make sure that the sound is optimal for recording, place some rugs or other sound-absorbing material on the floor and walls of your room so that less sound bounces off them when recording.
You can also use acoustic tiles to help dampen sound waves and give you a cleaner audio track — rendering more headroom for increasing microphone volume without sacrificing quality.
3: Check Your Audio Settings
Older audio interfaces often require manual gain adjustment before each session—otherwise, they may not pick up enough signal from your microphone. Make sure that these settings are optimized; otherwise, even a high-quality mic won’t be very loud in recordings.
Also, double-check any other settings related to input sensitivity — such as preamp level or line level settings —as they could be affecting how loud your microphone is being recorded.
Keeping all these settings properly adjusted will ensure a higher-quality end result with more natural-sounding audio levels throughout the entire take.
4: Increase Volume in Post-Production
If you find yourself still dealing with low microphone volume after following the tips above, then you can also increase the overall volume of your recording during post-production. You do this by using a plugin or software to amplify certain frequencies while adjusting the EQ to keep the vocals sounding natural.
Some popular tools include Waves MaxxVolume and Izotope’s RX7. Just remember that it may be more difficult (or even impossible) to salvage an audio track recorded at too low a volume.
5: Record in Smaller Environments
Large rooms tend to have more noise and reverberation than smaller spaces, leading to poor sound quality in recordings. That’s why most professional studios are designed for maximum noise isolation—minimizing unwanted background noise and increasing the clarity of vocals during recordings.
If possible, try recording in an environment with minimal background noise, such as a home studio or closet. This will make everything from dialogue to musical instruments much clearer and easier to hear without requiring additional amplification or post-processing.
6: Consider Upgrading Your Microphone
If you’re still running into problems with low lavalier mic for mobile phone volumes, then it could be time for an upgrade. Many modern mics are specifically designed for vocalists; they use built-in preamps and advanced technologies like internal capsules and integrated shock mounts that reduce static noise while amplifying sound quality at relatively high levels of gain.
Investing in one of these external microphones will bring your audio production up to the next level, allowing you to capture great sound quality no matter what environment you’re working in.
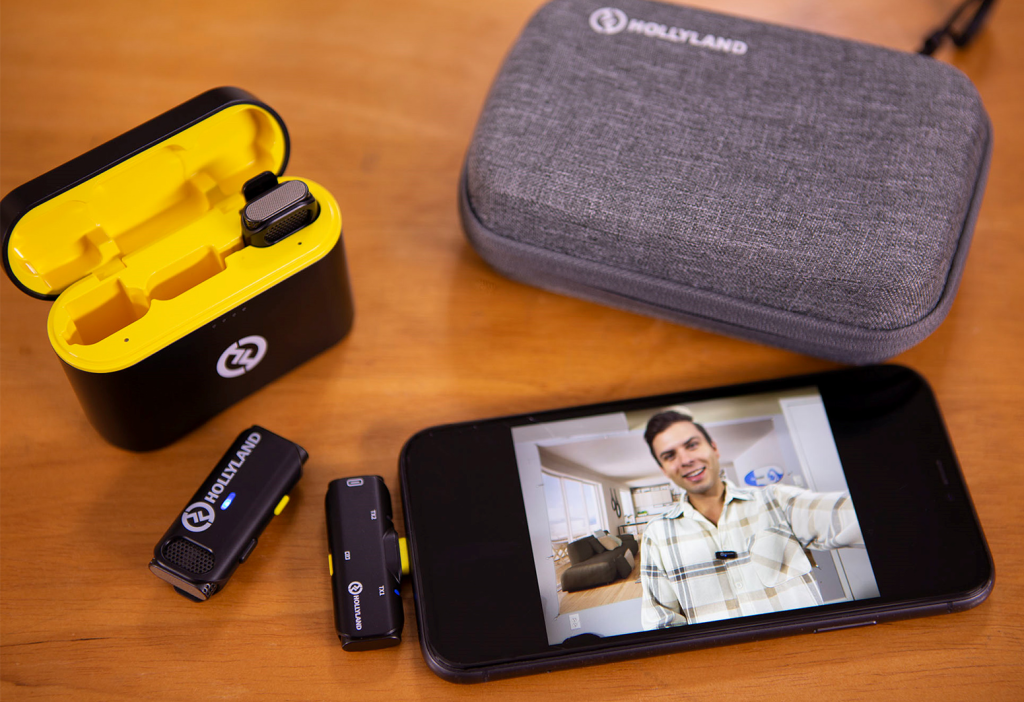
The Lark C1 lavalier mic for iPhone is one of the best microphones for vocalists and spoken word recordings. With its top-of-the-line features, it will ensure a clean and crisp sound that stands out from the rest. It’s also designed with an omnidirectional polar pattern to capture sound from any direction. So, no matter where you’re standing in relation to the wireless mic, you’ll still get the same level of sound quality and clarity.
7: Invest in a Microphone Stand
A good mobile microphone stand is essential for recording vocals. Not only does it provide stability and ensure your mic doesn’t move while you’re recording, but it also frees up your hands so you can control the audio levels or adjust the EQ settings on your computer.
Look for a stand that has adjustable height and angle capabilities, as this will give you more freedom when setting up the mic for optimal sound quality.
8: Record in Bursts
Recording in short bursts can help reduce noise and other distractions that could ruin an otherwise good take. This is especially true if you’re recording in a noisy environment — keep taking shorter to minimize extraneous sounds from entering the equation and increase the chances of a successful take.
Moreover, editing, later on, becomes much simpler when working with smaller files, so breaking up long recordings into multiple takes can save time during post-production too.
9: Use Headphones During Recording Sessions
Listening to what you’re recording through headphones is extremely helpful when laying down vocal tracks, as it gives you an idea of how everything sounds before committing to a final take.
Allowing yourself to hear exactly what’s being captured may even reveal nuances that weren’t picked up by just listening with your ears. For example, low hums from background noise or spitiness from overamplification. Use headphones to make sure that your recordings come out sounding perfect!
Conclusion
Making your microphone louder doesn’t have to be difficult — just follow the tips outlined in this article, and you’ll have great audio recordings in no time. Investing in the right equipment, such as a quality mic or stand, can make all the difference when it comes to achieving optimal sound levels.
Also, recording in smaller environments and using headphones during takes can reduce background noise and increase the clarity of your vocals. With these tips, you’ll be sure to have loud and clear recordings every time!
The Hollyland Lark C1 lavalier microphone for Android is perfect for recording vocalists, as it offers top-of-the-line features and an omnidirectional polar pattern that captures sound from any direction. Having a good microphone stand to provide stability and free up your hands while recording is also essential.